

How I Photograph my Miniatures
I enjoy photography as well as miniature painting, and have been trying to improve the way I take photos of my minis over the years. I'm by no means an expert, but I've managed to get some results I am pretty proud of. It's been particularly important recently, as I've been running D&D over Skype so being able to share my screen to show some high-res pics of the enemies that the party are facing (in miniature form) has helped get the players engaged with what they would be seeing if we were playing in-person. This has led me to trying to take photos of scenes incorporating bits of terrain, to give some context to what is going on, making little dioramas in my light box - which I think has been pretty cool!
Ultimately, I have a load of painted miniatures that I want to gradually get photographed nicely, and this process has helped me focus my thinking in how to do it. The goals of having models photographed for Dungeons and Dragons sessions has been a good incentive too.
Equipment
Lighting is key. The more light the better. I have a folding light box that I got a long time ago, quite cheaply. It came with some little lights but I've replaced those with four great big lights. I think the main thing is to try and get rid of annoying shadows behind the models, so that's why you need to light from multiple angles. I could probably do with one more light directly from the front, but this seems to be pretty good for now.
I boarded the whole of my loft recently, and that gave me the space to set up an old desk with the light box on permanently (though I fold it away when not using it to avoid it getting covered in dust!). This saves a lot of time as I can just plug the extension lead in, the lights come on and I can start shooting with no messing about.
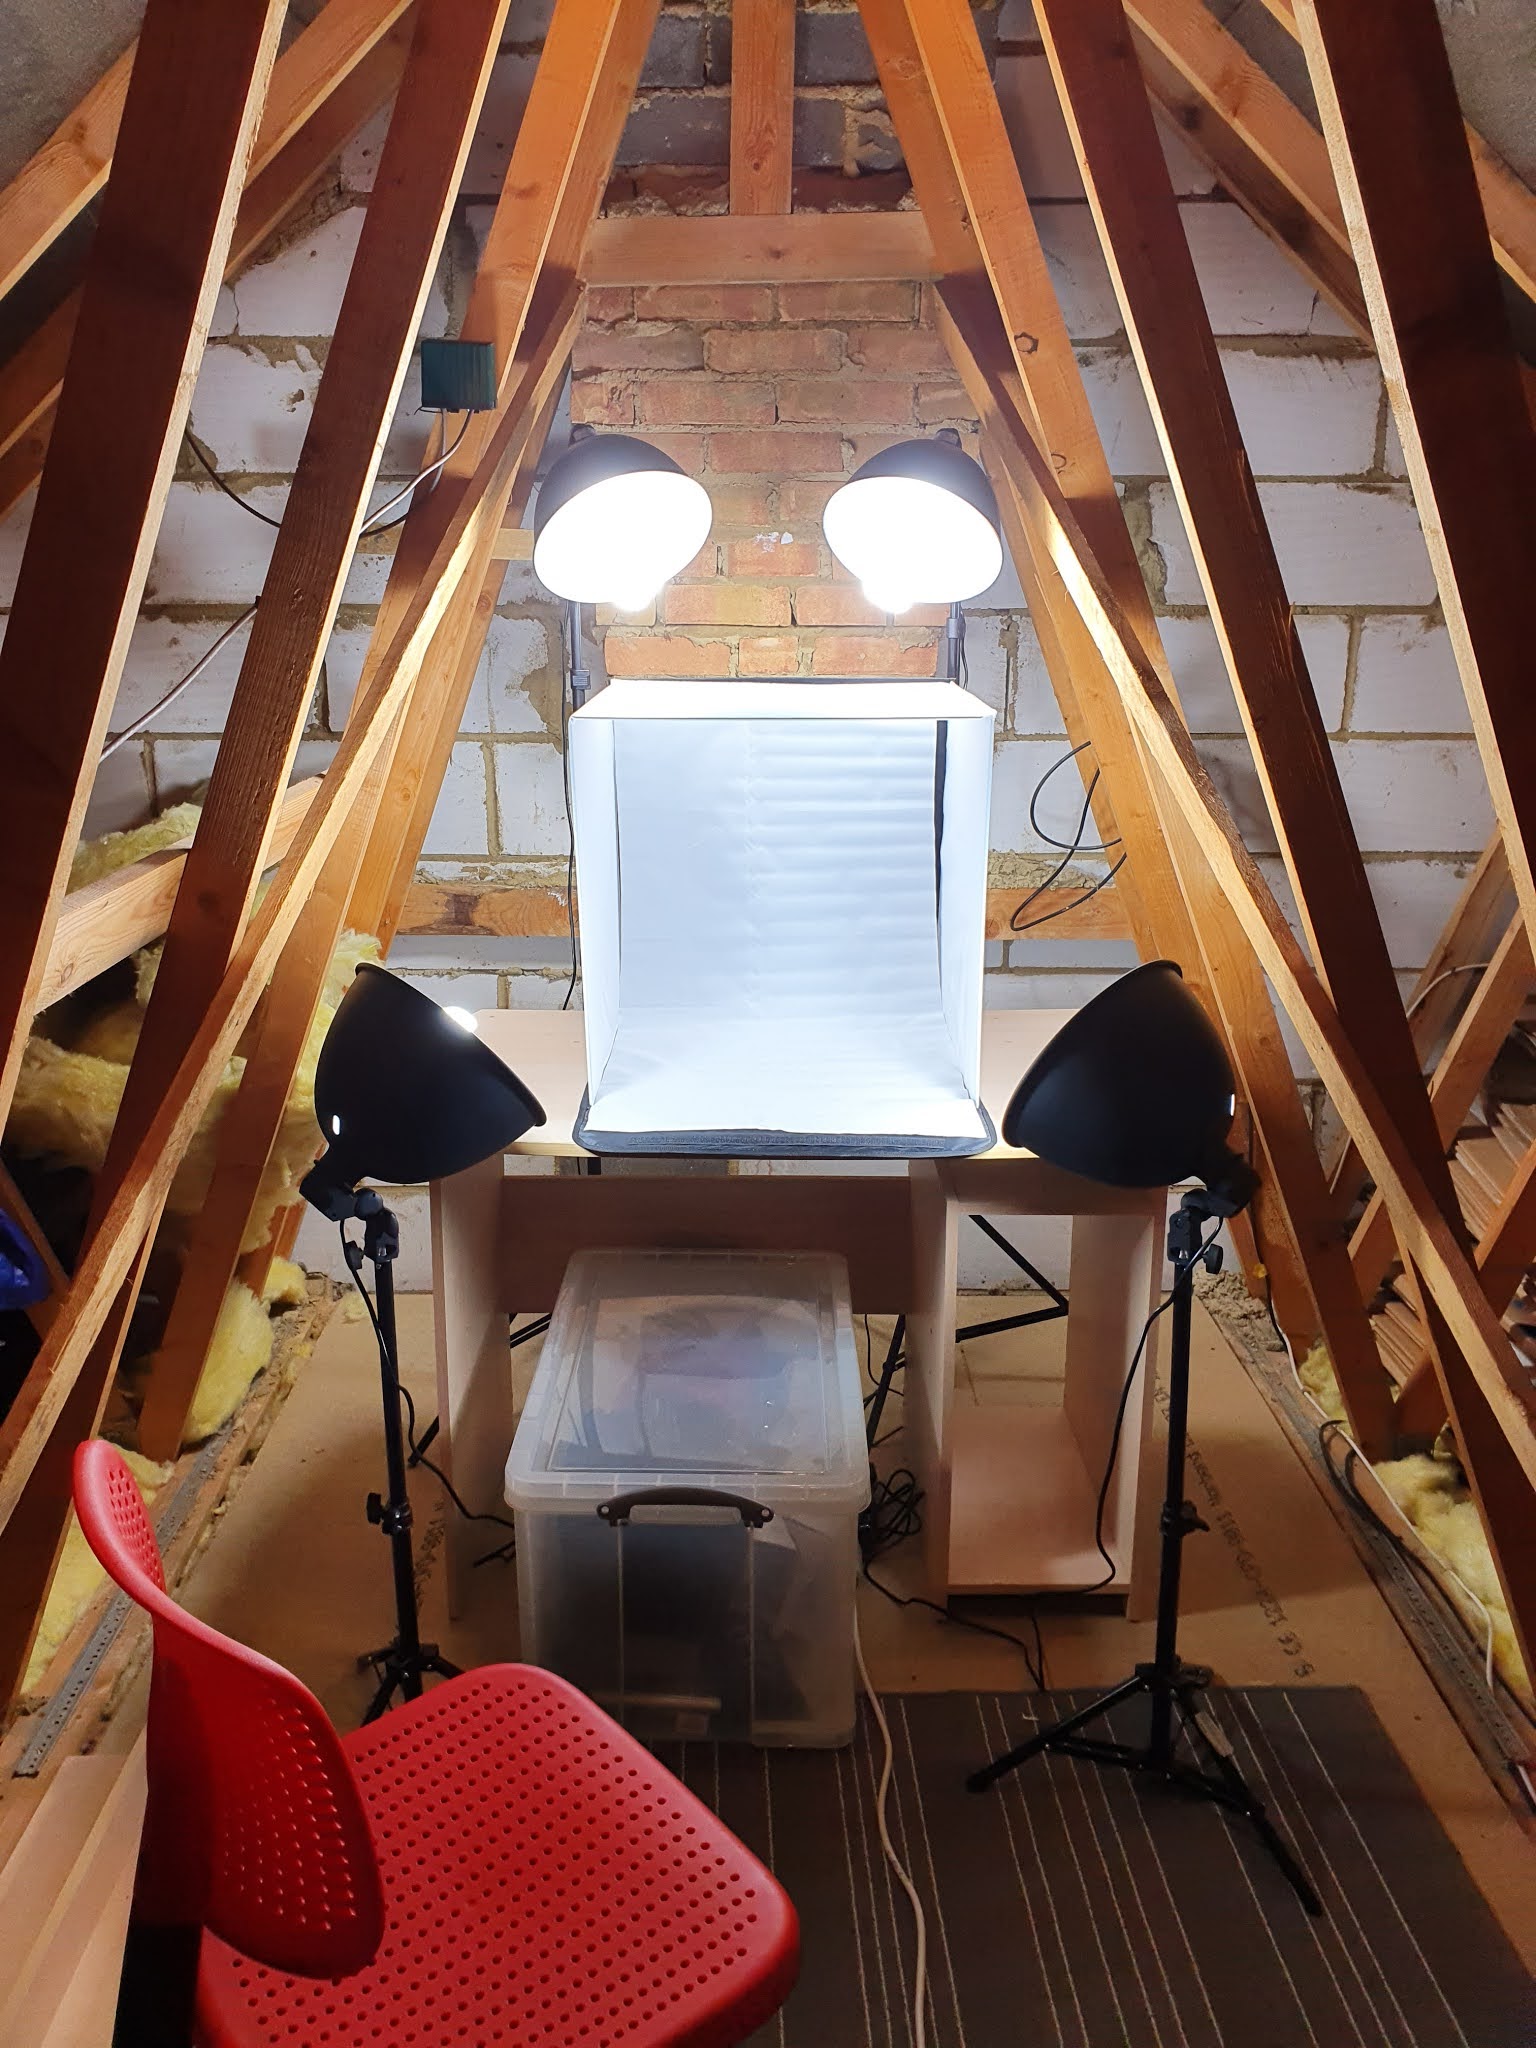 |
| My light box set-up in the loft |
In terms of camera equipment, I use a Nikon D7500 (used to use a Nikon D3300, but that is now relegated to my backup camera). It's a wonderful camera, I use it for loads of stuff. The main lens I use for miniatures is a Nikon VR 105mm Nikkor Micro lens. It's called a Micro lens but it's pretty chunky... and needs to be set up a fair distance away from the models! But the quality is fantastic.
I set the camera up on a tripod because it's zooming in on close detail and so that I can use fairly low shutter speeds if required. Additionally, I use the Nikon Snapbridge app to control the camera to avoid me shaking it at all when shooting. The app is pretty cool as you can set all the manual settings on it and you get a preview of what it looks like - though this is not perfect as it is always a lower resolution picture on a phone screen, so I've found it takes a bit of experience to get to grips with what settings work best. And just snap a few photos then see what is best later on when they are downloaded from the camera - the phone images are just a guide really.
Camera Settings
As I said, I'm not an expert, but I've done a bit of learning about F-stops and exposure times and things, and through experimenting I think something along the lines of the following settings works pretty well (with my set-up). It all depends on the colours of the models, the size of them and how much you want to get in focus - sometimes forcing the focus somewhere to blur the background or foreground looks pretty cool and draws the eye to the important bits.
These two photos were for enemies in D&D. Both were to be encountered in a dungeon, so I used this terrain piece I had to give the flavour of where they were, but I wanted to focus in and make it seem like we were zoomed in on one little bit of a larger dungeon - I think the foreground being slightly out of focus achieves that quite nicely. The settings are slightly different between the two, just because they looked better that way! I've included the camera settings below each one.


This massive beast is a giant from Heresy Miniatures - he is holding a 28mm paladin in his hand, so you can tell how big he is! Getting this bloke all into focus required quite a different set-up on the camera, but I think it came out pretty well. I would like to re-do these photos at some point to improve on them and remove that fold in the backdrop, which is a bit annoying... but in essence the camera settings seemed to work fairly well, with the large F-number getting as much of him and his big belly into focus.


It's a Learning Process
I'll be looking at taking some better photos of that giant again in the future, along with his mates. It's all a learning process, and I think I'm getting better each time I mess about with the camera.
Looking back at some old photos is interesting. Sticking with the large model theme, I had a go at taking a picture of my Ork Stompa about 4 years ago. This was using the same light box, but not the same lighting set-up. Also, I used my D3300 camera and a more standard lens (that was partly because I didn't have the space to stand back far enough to use the Micro lens). The raw photo below isn't terrible, but there is quite a lot of shadow, not nearly enough light, backdrop is looking poor...
 |
| Old photo of my Stompa, using my D3300 |

But then I did a bit of manipulation on the computer, nothing overly fancy - just boosting the exposure, brightness and contrast a bit, cropping it down, couple of tweaks like that. And it looks a lot better. Could certainly be improved on, but it's not awful. What I should do (soon!) is get that model in my new set-up and try again - like with many things, you can tweak all you want on the computer but if the original image isn't good enough, it will always hold you back. The other images I have shown haven't had any manipulation - I am trying to only crop images if necessary, rather than alter them, with the intention of getting the camera set up correctly in the first place to capture the images properly. I think this Stompa photo has ended up looking OK, but with what I've learned more recently and the improvements in the process, I should be able to get some much better pics of this clanking Ork monstrosity.
 |
| Same photo touched up in software - shows potential |
One of the issues I have noticed is on the other end of the scale - with smaller miniatures. Taking really nice, zoomed-in, high-resolution photos of little miniatures really shows up anything that isn't quite right with the model!
My philosophy, particularly in recent years with having a young child and all that normal 'life' stuff going on, is not to get bogged down in spending too long painting tiny details on miniatures. I used to get really concerned about eyes and stuff - nowadays, I don't generally care. My view is normally a couple of feet away from the models that are sitting on the tabletop - from that vantage point, you normally can't see the eyes very well anyway. A nice wash gives some darkness around the eyes anyway, and I think that's normally fine. I will usually do nice red eyes for orcs and something for larger monsters, and occasionally for humans if I am feeling fruity, but generally I don't bother. Likewise, I am trying to keep my paint jobs more simple than I used to do, not sweating over the small stuff and just getting them on the table.
Which works great, and means I have painted a lot more recently in less time.
But sometimes looks a bit dodgy on a large screen.
Is it a problem? No, I don't think so... I mean, I have looked at photos like the one below (of the current D&D party) and lamented some of the sloppiness in the painting that I hadn't really noticed or cared about when I was holding the miniatures to paint or game with them. But, at the end of the day, it's a conscious decision to balance my life and my painting, so it is what it is. If the photography is an accurate portrayal of the miniature then that's what it is going to look like! I think the overall effect is pretty good on them - I'm not winning any painting competitions (although, having said that, I won a couple of awards at our local club a couple of years ago, which was nice). But that's not why I'm doing it, they serve their purpose of being enjoyable to paint and play with.
 |
| The current D&D party. The camera reveals all!! |
Future Improvements
So these are just a few thoughts about how I've been going about trying to get decent photos. Nothing ground breaking but maybe some inspiration to get better photos. I definitely have a few things I want to look at to improve my photography in the future:
- A new, larger lightbox would be useful to take photos of larger models / groups of models
- Certainly an improvement to the backdrop to avoid any wrinkles or folds being seen would be good. I have ironed it and now store it rolled, so it is better than when I shot the giant, but I think it could still be improved
- Maybe some more light, I still sometimes get some shadows that I'm not happy with - maybe another light directly in front would help
No comments:
Post a Comment